

Holly Gets a Makeover
First, let me state that this isn't a Photoshop tutorial, it is a description of the workflow I generally use to touch-up a portrait shot. The editing could be done in a variety of photo editing packages. Some of the steps are optional and others would not be required depending on the individual image. I chose this image because it contained a wide selection of issues typically found in a natural light portrait. A studio portrait, when done correctly, usually requires a lot less work.
The art of a good touch-up is to be so subtle that the model believes they really do look like the final image. It is a refinement of what is already there. How they would look if all their spots were healed, the skin tone smooth, their eyes clear and bright, and the lighting perfect. This type of editing is not even vaguely related to the Instagram filters that are so popular these days. They are used to create a stylised version of the model where there is a disconnect between reality and the processed photograph.
The steps outlined below describe the flow of the editing process. I have used the phrase "Layer" at the start of each step as that is how I work in Photoshop. Each edit is made on a new layer, in that way I can always step backwards if I make a mistake or simply don't like where the image is heading:-
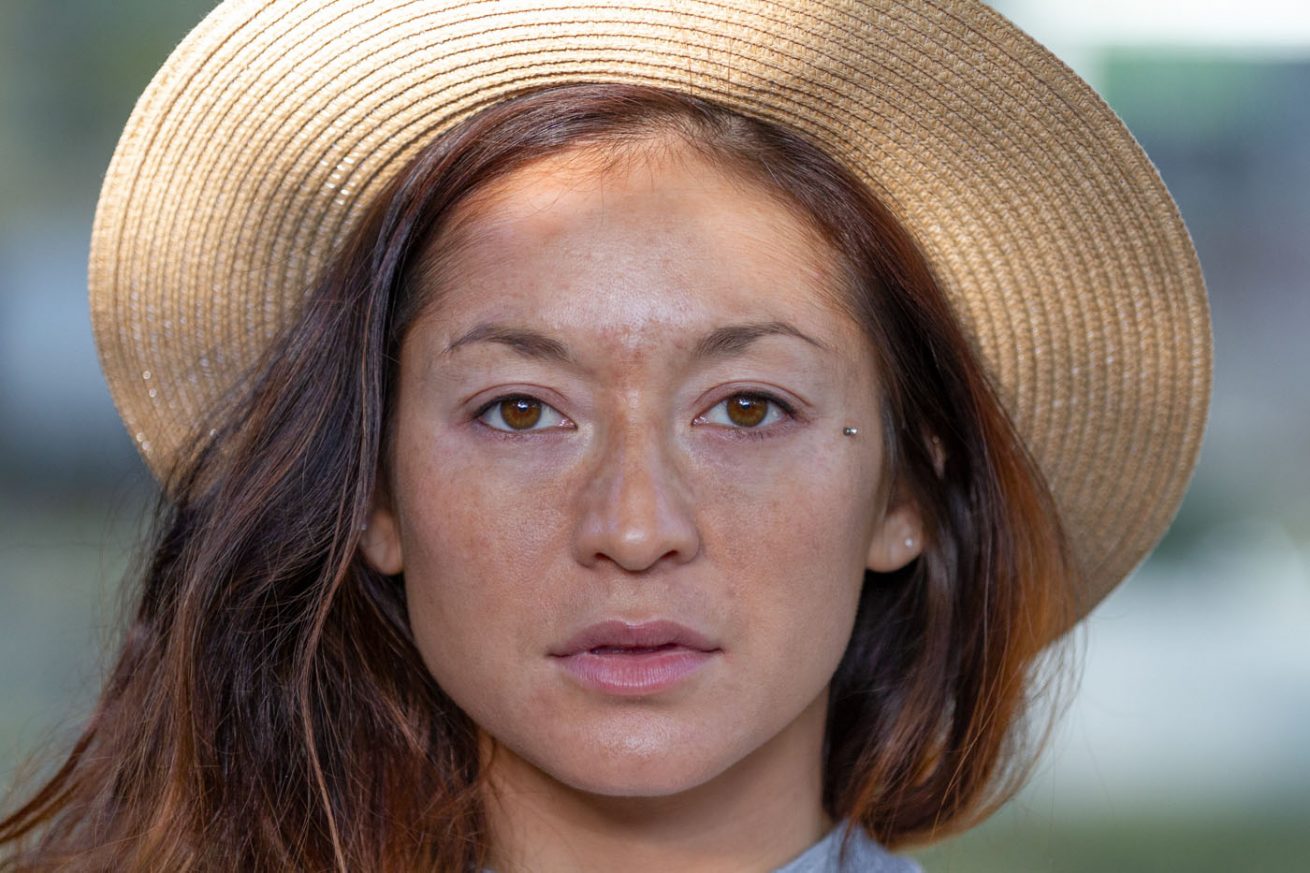
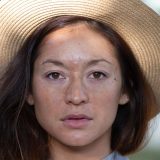
Layer 0 - The original image
I start by reviewing the image to judge if it is worth the effort of editing. It needs to be sharp in the right places, with no blown-out highlights and above all represent the model well. It's no good editing a bad photograph that the model wouldn't like regardless of how good the quality is.
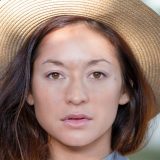
Layer 1 - Tonal Adjustment
I will duplicate the image to a new layer and use the RAW editor to adjust the Black and White sliders so that the range from dark to light spans the whole width of the histogram. I will then tweak the Shadow and Highlight sliders to ensure the best distribution of tones across the histogram. This is a simple mechanical exercise and is independent of the image contents.
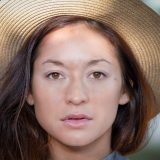
Layer 2 - Blemish Removal
I will add a blank layer and, using the Spot Healing Brush (sampling all layers), I will set about removing any obvious skin blemishes. This would include spots and pimples, scars, makeup spatter, stray hairs, fine wrinkles and moles that I don't want to retain,
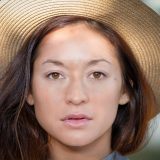
Layer 3 - Skin Redness Correction
This is an optional step only used if there is obvious redness on some of the skin. I will add a Hue-Saturation adjustment layer and select the reds channel. I will then ramp up the saturation to its maximum so that the reds are glaringly obvious. I then use a selective colour slider to narrow the shades of red that interest me.
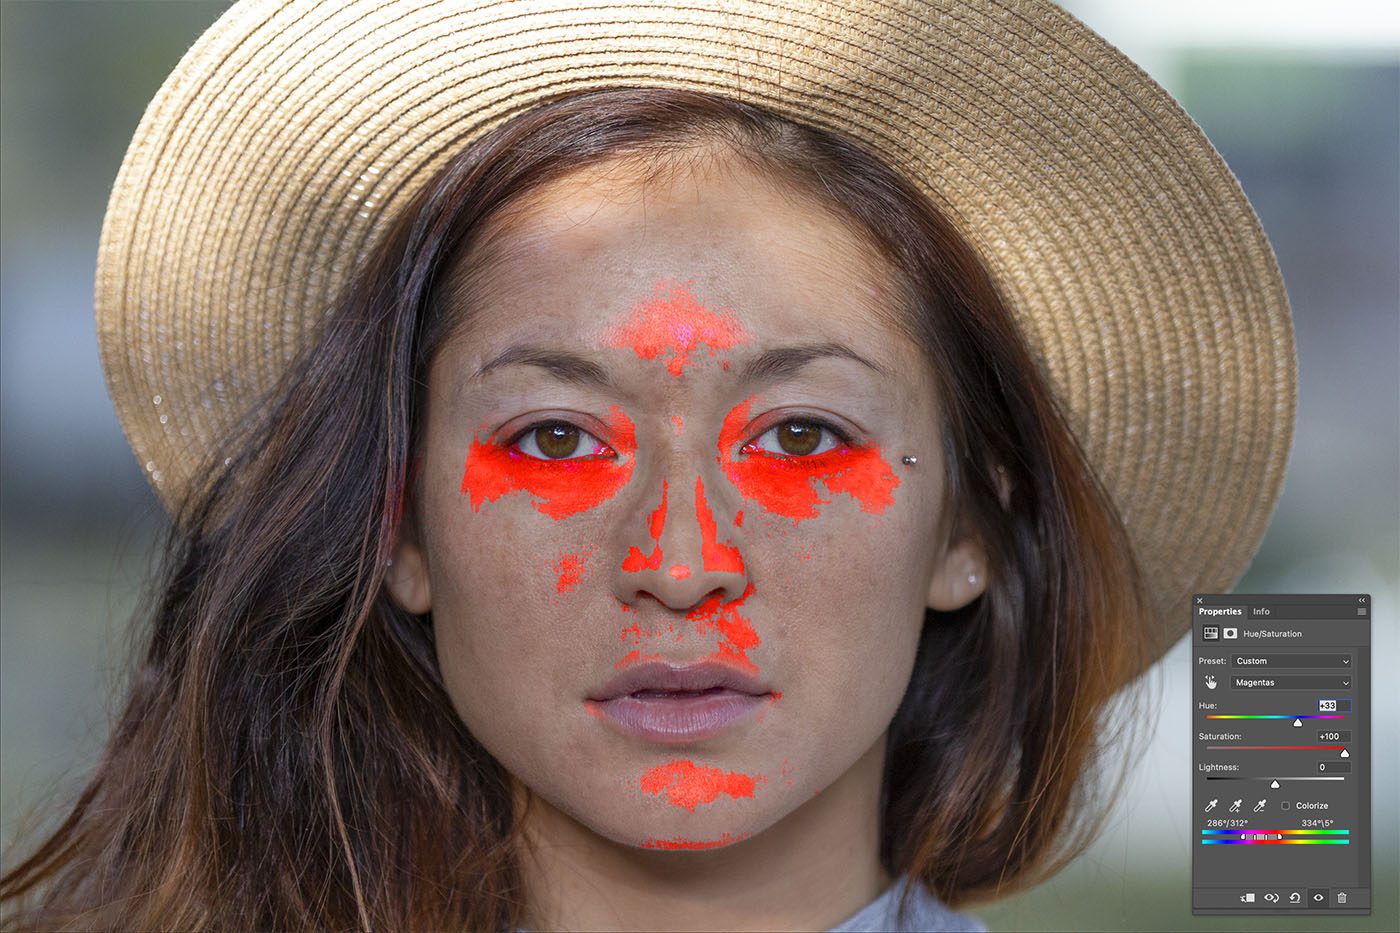
Once the correct area of red skin tones has been identified and filtered out, I can dial the saturation back to zero and tweak the hue slider to change the red tones to something more aligned with rest of the facial colour.
Layer 4 - Skin Smoothing
At this point in the editing process, I would normally have undertaken skin smoothing using the technique known as frequency separation. In frequency separation, you split the skin texture onto one layer and the skin colour onto another. There are numerous tutorials on Youtube showing how this can be done. The concept is that you use the skin colour layer to blend them using a selection of Gaussian blurring and in this way, all those blotchy skin tones are smoothed out as if the model had a perfect makeup job. Meanwhile, because the skin texture is retained on a separate layer all the skin pores and fine lines are retained. You can then make minor corrections on the texture layer to fix any remaining spots and scars without altering the skin tone. This is a fairly complicated process, but with practice, it becomes second nature and only takes a few minutes to complete.
However, for those of you with the latest version of Photoshop, Adobe has added a new menu option Filter - Neural Filter, that completes this entire process at the click of a button.
I felt a little cheated out of my hard-earned skill when Adobe introduced this feature but the time saving is invaluable. I can still make a slightly better job of it by investing more time but the one-click solution is pretty close to perfect.
Layer 5 - Skin Brightness
At this point, I duplicate the smoothed layer and open the RAW editor again to brighten the skin tones and generally lighten the face. I then apply a mask and make sure that the rest of the image is not altered. This is, once again, an optional step depending on the image and effect I am looking for.
Layer 6 - Eye Boost
We are now in the home straight and making the final tweaks. I like to boost the brightness, colour and contrast in the eyes to make them pop. I use a layer mask to keep the edit isolated to the eyes. I do this on another duplicate layer and usually using the RAW editor to make the adjustments. Once again, there are many techniques for editing and boosting the eyes that can be found on Youtube, some more complicated than others.
Layer 7 - Lip Boost
The lips usually show subtle white highlights where the light catches them and in the case of female models, I like to enhance those highlights by accentuating them. I create a blank layer and paint in white, over the white that is already there. I then use Gaussian blur to soften the painted lines and reduce the layer opacity until I achieve the desired effect.
Layer 8 - Selective Sharpening
I roll up all the changes made so far into a compound layer and my final editing step is to apply discrete sharpening to very specific areas of the image. This is applied, using the Sharpen Tool, to eyebrows, eyelashes, lips, jewellery, hair and other areas I want to "pop".
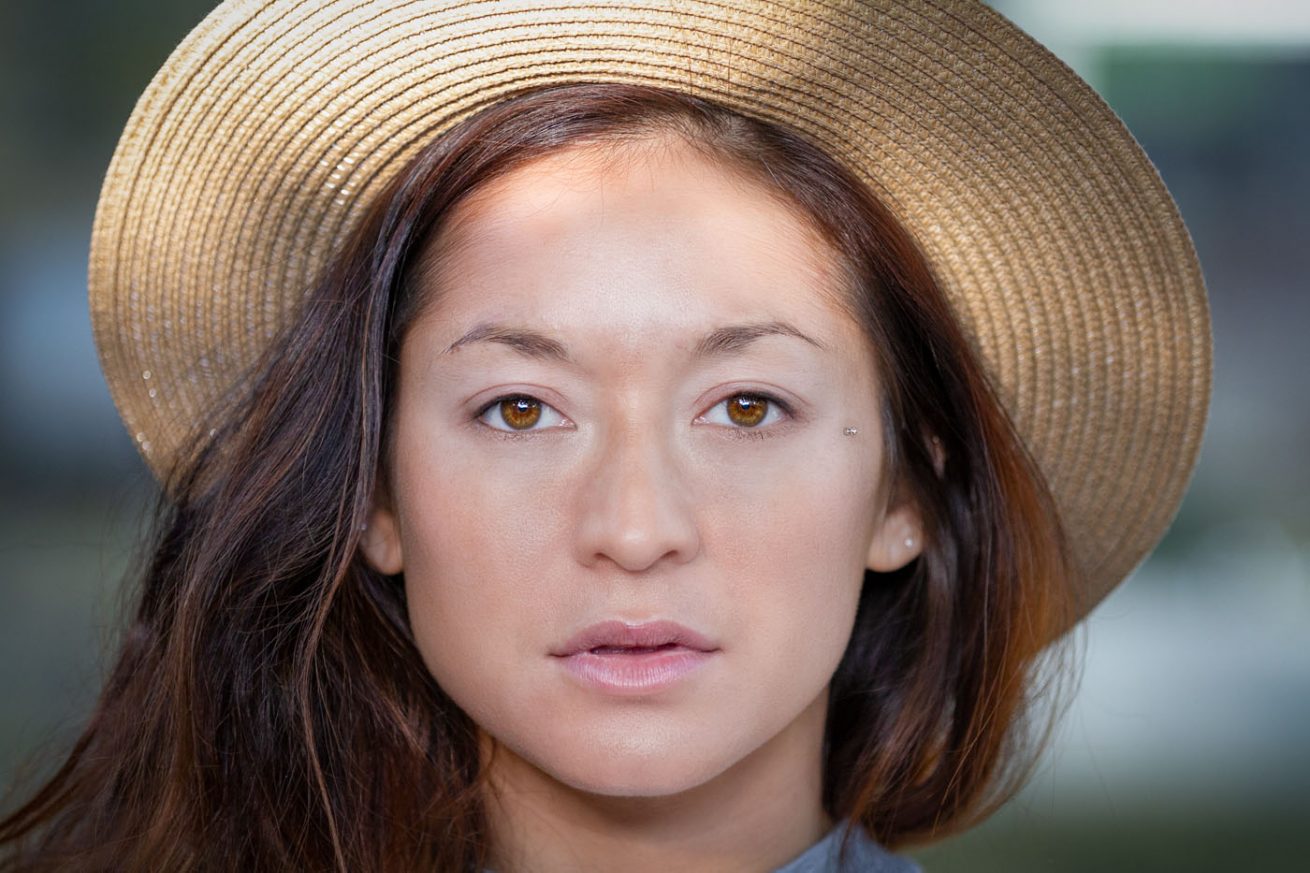
Layer 9 - Warming the Image
In the case of this specific image, I felt that the colours looked a little too cold for the summery style of the photo. I used the RAW Filter to adjust the colour temperature to make the image look a little more summery.


Leave a reply
You must be logged in to post a comment.